Xilinx ISE
Contents
Installing Xilinx ISE in Linux
All this information was extracted from Here are the instructions how to install the JTAG driver and software on a Linux PC.. There are no special issues on a Windows PC.
When installing Xilinx ISE, make sure that the installer is located on the hard drive. The installer needs to have write permissions to the setup files. Burning the files to DVD has been reported to create problems.
Download Xilinx ISE from their website. This instruction has been tested with Ubuntu 14.04 64-bits and the ISE 14.5 64-Bits.
Extract the archives to a place with read and write permissions, and chmod the installer file executable my all. To do this, change into the folder with the installer files are located and issue the command
sudo chmod a+x xsetup
Then you are ready to install the ISE suite. I suggest you do this as root. To start the installer, enter the following command:
sudo ./xsetup
Select the ISE Design suite: System Edition and install it. The ISE will be installed under /opt/Xilinx/14.5 . When asked, uncheck all options for the installation and start it
If the PC will be used only for programming and not for compilation, select Lab Tools in the installation process!
JTAG Kabel in Linux
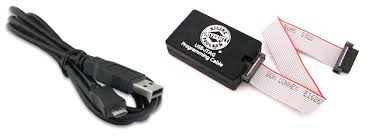
This guide describes how to work with the original programmer from Xilinx (Plattform cable usb II) or the Digilent clone (XUP USB-JTAG).
When the programmer is connected to the computer the programmer firmware will be updated and it will be mounted and the permissions will be set. To do this some software must be installed and compiled.....
Getting what's needed
First of all, this guide assumes you have installed Xilinx ISE (version 14.5 is used here) into the default path of /opt/Xilinx Next, you will need to have GIT installed to get the required libraries. This approach does not use the official Xilinx libraries but a replica of them. You will also need libusb-dev which is required in the compiling of the drivers. You will also need build-essential metapackage for the compiler. On a 64-bit host, you will need to get the 32-bit version of libc6-dev-i386.
On 32-bit
sudo apt-get install gitk git-gui libusb-dev build-essential libc6-dev fxload

On 64-bit
sudo apt-get install gitk git-gui libusb-dev build-essential libc6-dev-i386 fxload
Download the driver source
You should firstly change to the installation directory. You need (assuming default install path) to change directory to /opt/Xilinx. Then you will be required to use git to download the source.
cd /opt/Xilinx
sudo git clone git://git.zerfleddert.de/usb-driver
Compiling the Driver
This step is once simple command, but the most important. It compiles the cable driver required. There are two versions depending on the version (32-/64-bit) of Xilinx ISE you have. Firstly change into the source directory created in the previous step. Then you need to issue the make command.
cd usb-driver/ sudo make
Since the drivers now support 64-bit too, you don't need to build the 32-bit version. If you have trouble, try sudo make lib32 to build the 32-bit driver.
Setting up the Cable Driver
The newer versions of the usb-driver come with a setup script, which is very useful! You can run setup_pcusb and have it do all the complicated stuff for you, thusly...
/opt/Xilinx/usb-driver$ ./setup_pcusb /opt/Xilinx/14.5/ISE_DS/ISE/
Fixing the Path
This step may not be required if the Xilinx install appends to your .bashrc automatically: Running the following two lines will add the Xilinx path to the system path, and will ensure that the Xilinx binaries are accessable by the system.
 32-bit
 echo "PATH=\$PATH:/opt/Xilinx/13.2/ISE_DS/ISE/bin/lin" >> ~/.bashrc echo "export PATH" >> ~/.bashrc
 64-bit
 echo "PATH=\$PATH:/opt/Xilinx/13.2/ISE_DS/ISE/bin/lin64/" >> ~/.bashrc echo "export PATH" >> ~/.bashrc
Some people reported that the 32-bit version didn't work correctly on 64-bit host. Ensure you are using the 64-bit version of the ISE software. The 64-bit stuff is located in /opt/Xilinx/11.1/ISE/bin/lin64/
Checking the installation
If everything went ok a new rule file "xusbdfwu.rules" may have been created under /etc/udev/rules.d/ with the following content:
# version 0003
ATTRS{idVendor}=="03fd", ATTRS{idProduct}=="0008", MODE="666"
SUBSYSTEMS=="usb", ACTION=="add", ATTRS{idVendor}=="03fd", ATTRS{idProduct}=="0007", RUN+="/sbin/fxload -v -t fx2 -I /usr/share/xusbdfwu.hex -D $tempnode"
SUBSYSTEMS=="usb", ACTION=="add", ATTRS{idVendor}=="03fd", ATTRS{idProduct}=="0009", RUN+="/sbin/fxload -v -t fx2 -I /usr/share/xusb_xup.hex -D $tempnode"
SUBSYSTEMS=="usb", ACTION=="add", ATTRS{idVendor}=="03fd", ATTRS{idProduct}=="000d", RUN+="/sbin/fxload -v -t fx2 -I /usr/share/xusb_emb.hex -D $tempnode"
SUBSYSTEMS=="usb", ACTION=="add", ATTRS{idVendor}=="03fd", ATTRS{idProduct}=="000f", RUN+="/sbin/fxload -v -t fx2 -I /usr/share/xusb_xlp.hex -D $tempnode"
SUBSYSTEMS=="usb", ACTION=="add", ATTRS{idVendor}=="03fd", ATTRS{idProduct}=="0013", RUN+="/sbin/fxload -v -t fx2 -I /usr/share/xusb_xp2.hex -D $tempnode"
SUBSYSTEMS=="usb", ACTION=="add", ATTRS{idVendor}=="03fd", ATTRS{idProduct}=="0015", RUN+="/sbin/fxload -v -t fx2 -I /usr/share/xusb_xse.hex -D $tempnode"
In our case, when we connect the Programming cable from digilent, a new device will be detected with a VID = 0x03fd and PID = 0x000d after one second this device will be disconnected and a new device with VID = 0x03fd and PID = 0x0008 has to appear as USB device.
You can check it listing the usb device connected to the system and displaying the events log file under /var/log/messages
lsusb
dmesg

